Tech Thursday: Screen Share in Zoom
How to share only part of your screen & not waste time with sharing settings.
I know not everyone uses Zoom, so my apologies for the targeted audience today. I’ve seen a lot of questions about issues with screen sharing in Zoom and trying to share a PowerPoint AND videos, or multiple screens, or not being able to see the chat or participants while screen sharing. This solution helps with all of those issues.
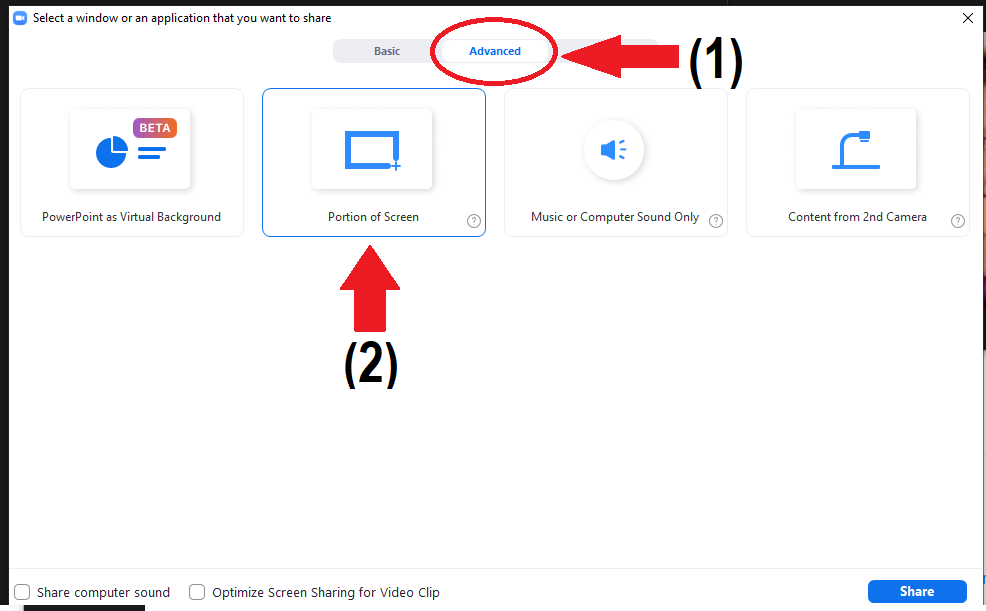
The key is to share only a portion of your screen. When you select share, click over to the “Advanced” tab (#1 in the picture below) and then choose “Portion of Screen” (#2).

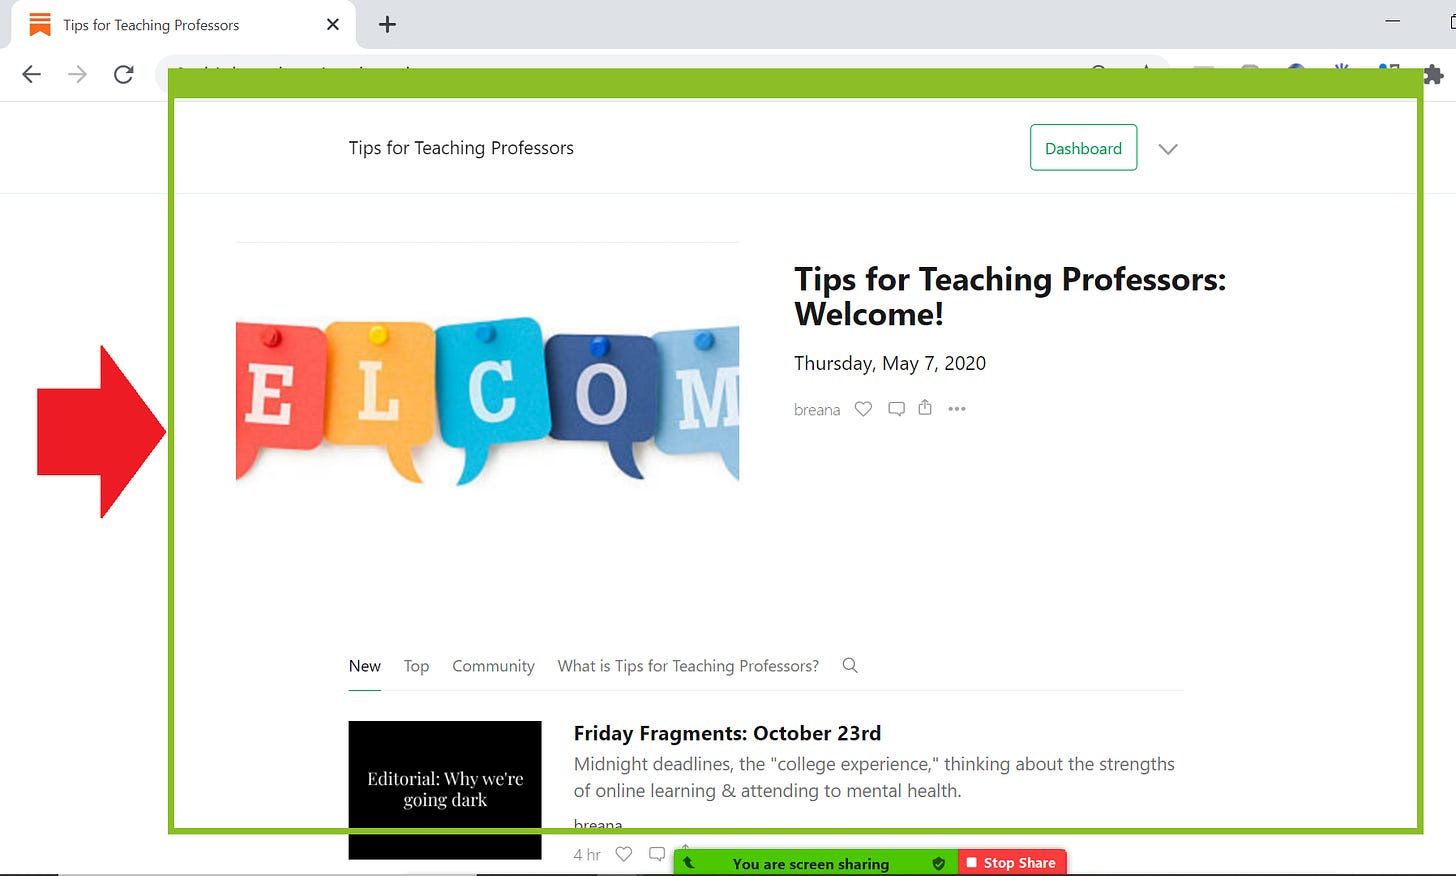
Next a green rectangle will pop up, showing you what part of your screen you’re sharing with your audience. Anything you drag into this space will be shared. You can position the green box anywhere on your screen(s) and make it any size you want.

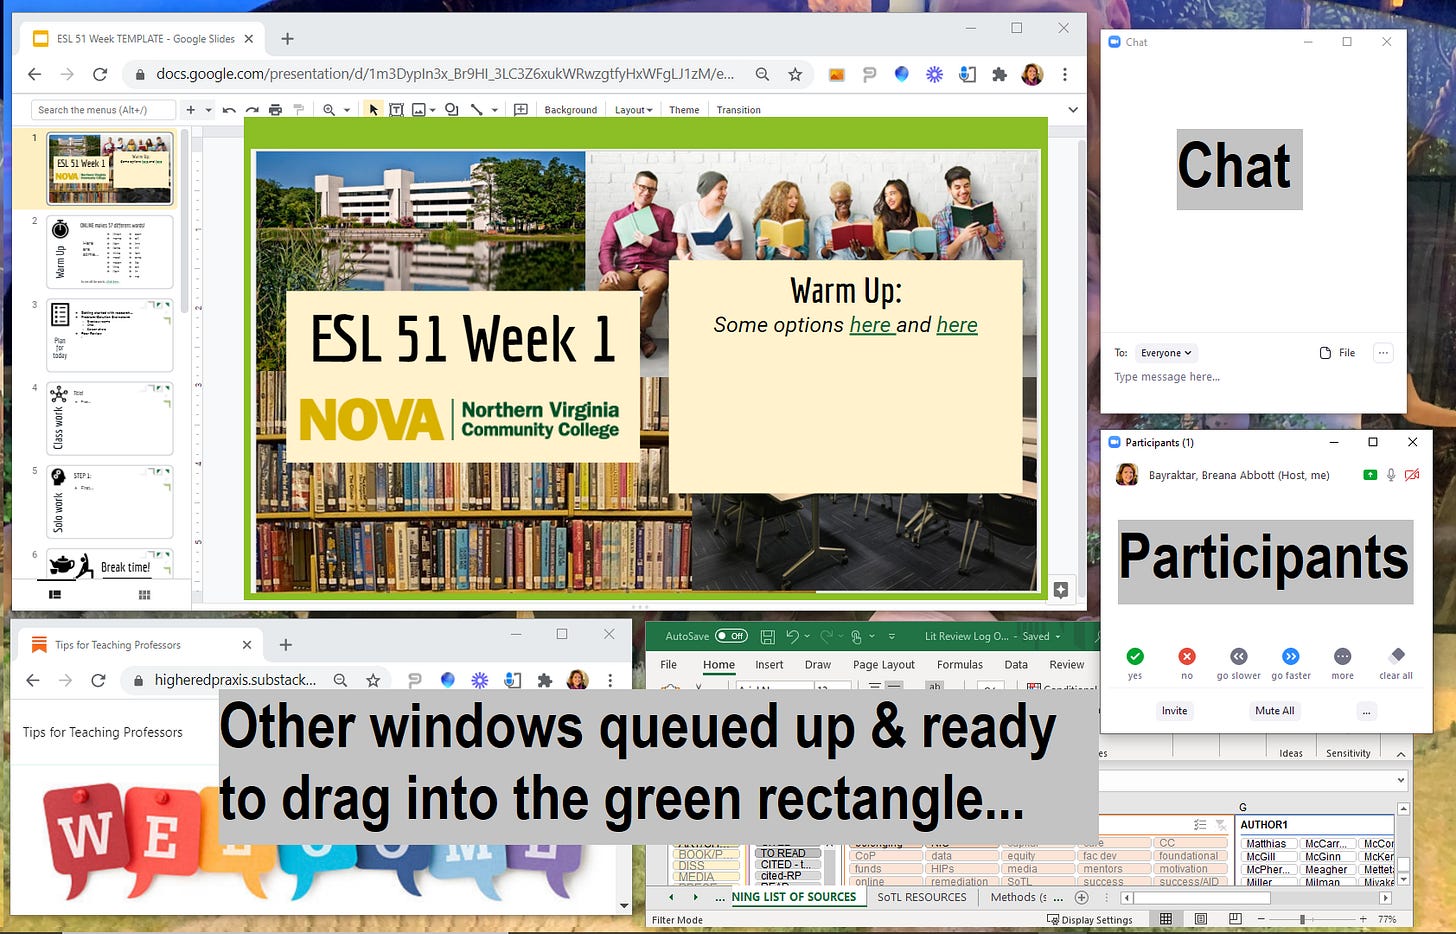
I usually have several items queued up, and use the space at the margins to have the chat and participants list floating open outside the green box.

Remember - your students only see what’s in the green rectangle, and it sizes to fit their viewing window. You can drag the edges of the green box to change its size as well. I find using the “share a portion” function really speeds things along, because I never have to worry about un-sharing and then trying to find the new window I want to share.

Past Tech Thursdays
Mailbird email program
Using screenshots
Voice-to-text options
Wheel of Names (random name generator)


