Tech Thursday: Collaborating in Google Slides
How to make parts of a Google slide "locked" so students can work collaboratively.
I’m trying something new and adding a day to my weekly writing schedule - which currently has the more in-depth, themed Teaching Tips coming out on Tuesdays and quick reading suggestions, Friday Fragments, coming on Fridays. As we all dive into remote synchronous, hybrid, and HyFlex teaching modes, I’m hearing more questions about specific technology tools and also lots of great “This is what I do!” suggestions. I’m going to try to capture some of these good suggestions here, with occasional Tech Thursday posts.
Teaching remote synchronous writing classes this semester, I have been using shared Google Docs to incorporate more collaborative opportunities during class. A couple weeks ago I shared how to edit the Google Doc link to turn it into a “Make a Copy” prompt, which is great for when you want each student to have their own copy. For students to all collaborate together on the same document, though, you’ll want to share the document link with settings that allow students to edit, not just view or comment.
When you do this, of course, students can edit the file. Any of the file, as my child’s math teacher learned this morning when her number lines all disappeared off the shared slides the class was working in. Although college students are less likely to mischievously delete items, I’ve found that it’s quite likely they will accidentally move things. Luckily, there’s a way to lock certain components of a slide by making them a picture file, and then making the picture the slide background. It takes a couple steps, but if you're using the same background (like a number line) across multiple lessons, it might be worth the extra steps.
Navigate to the slide you want to use with students, where you have some elements you want locked and some you want students to be able to engage with.
Select all the elements on the slide that you want to lock or prevent your students from editing - they could be images or text boxes.
Make sure you arrange all the elements exactly how you want them to be locked.
Download the slide as a PNG file: File > Download > PNG Image.
Go to a blank slide, right click and select 'Change Background' from the options.
Drag the png. image you downloaded into the upload box - now you have a background that students can’t accidentally delete or move around.
Now you can add the text boxes, images, etc. that you want your students to be able to interact with.
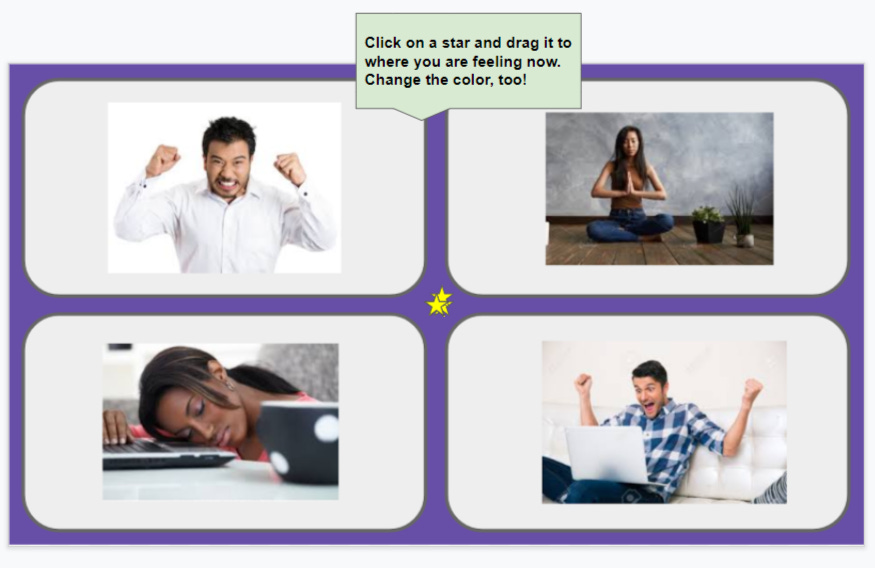
In the example slide below (borrowed from Theresa Wills, math education professor at George Mason Univ.), the images are all locked, and the students can move/edit the stars. I used this as part of my warm-up/welcome to class this week, and students enjoyed being able to show where they were feeling about online learning this week.

Image/slide design credit: Theresa Wills
If you prefer to see a video walking you through the technique, here’s a good one.


